
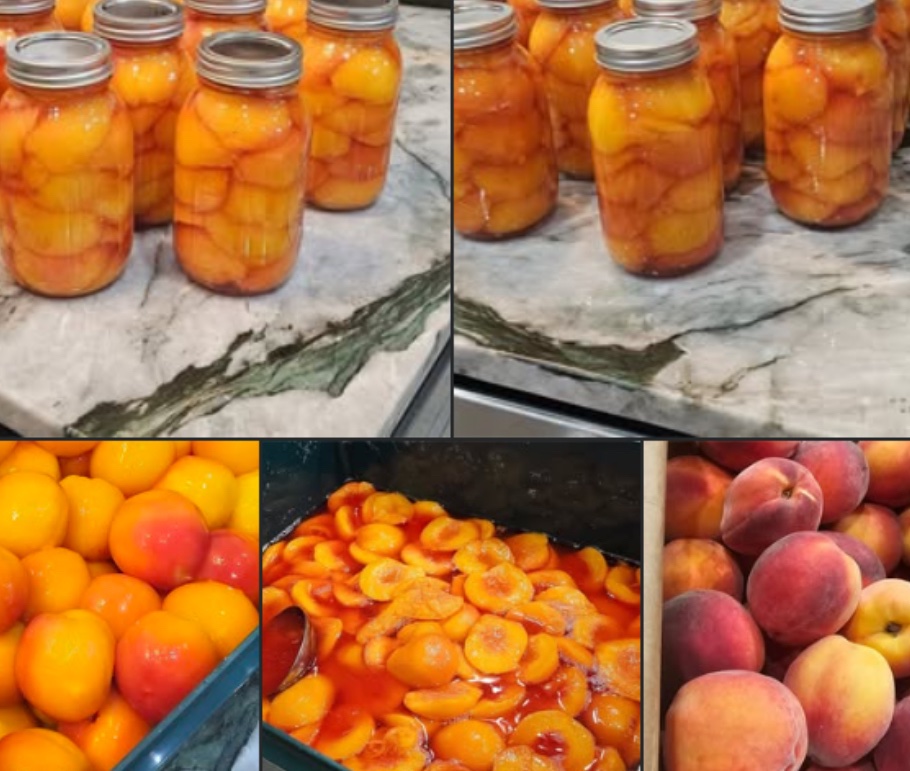
# Peaches & Pride – A Canning Story
Canning is not just a method of food preservation; it is an art form that has been passed down through generations. Among the vast array of fruits that can be jarred, peaches hold a special place in many people’s hearts. This article will explore the intricate process of canning peaches, the benefits of home-canned goods, and how this nostalgic practice can bring immense pride and joy to your kitchen.
## The Joy of Canning Peaches
Canning peaches allows you to savor the sweet, juicy flavor of this beloved fruit long after the summer season has ended. This method of preservation has grown in popularity due to its ability to extend the shelf life of fruits while providing an opportunity for creativity. Whether you are an experienced canner or a curious beginner, canning peaches is a fun and rewarding endeavor.
### Why Choose Peaches?
Peaches are not only delectable but they are also rich in nutrients. They are packed with vitamins A and C, fiber, and antioxidants. Choosing to can peaches can elevate your culinary creations, allowing you to enjoy their deliciousness year-round. Additionally, fresh peaches are often available in greater abundance during the harvest season which coincides well with the peak of their flavor.
### Essential Tools for Canning
Before diving into the canning process, it’s essential to gather the proper tools. Here’s a list of items you’ll need:
1. **Canning Jars**: Choose high-quality glass jars specifically designed for canning. Quart and pint sizes are both popular choices for peaches.
2. **Lids and Rings**: Ensure you have the correct size lids and metal rings to create a seal.
3. **Water Bath Canner**: This large pot is necessary for processing jars at high temperatures.
4. **Jar Lifter**: A jar lifter helps you safely remove hot jars from the water bath.
5. **Funnel**: A canning funnel ensures that you fill jars mess-free and keep the rim clean.
6. **Ladle and Measuring Cups**: These help in portioning out the fruit and syrup accurately.
### Canning Process: Step-by-Step Guide
Canning peaches is a straightforward process that can be broken down into several stages. Here’s how to do it:
#### Step 1: Selecting and Preparing Peaches
Choose ripe, unblemished peaches for canning. Ideally, they should be at their peak ripeness. Start by washing the peaches thoroughly under cold water. To peel them more easily, you can blanch them in boiling water for about 30 seconds. Transfer them to an ice bath, and the skins will slip off effortlessly. Once peeled, slice the peaches in halves or quarters, discarding the pit.
#### Step 2: Prepare the Syrup
You can choose to can peaches in either water or syrup. A light or medium syrup is often preferred as it enhances the flavor of the fruit. To create the syrup, combine sugar and water in a saucepan over medium heat, stirring until the sugar is completely dissolved. Generally, use 1 cup of sugar for every 4 cups of water, but feel free to adjust according to your taste preference.
#### Step 3: Filling the Jars
Prepare your sterilized jars by placing a funnel on top. Pack the peach slices into the jars, leaving about half an inch of headspace at the top. Then pour your syrup over the peaches, ensuring they are completely submerged. Use a or a spatula to remove any air bubbles that may have formed. Wipe the rims of the jars clean with a damp cloth before applying the lids.
#### Step 4: Processing the Jars
Once your jars are filled and sealed, it’s time to process them. Place jars into the water bath canner filled with boiling water. Ensure that water covers the jars by at least an inch. Process pint jars for about 20 minutes and quart jars for 30 minutes. The processing time can vary based on altitude, so be sure to consult the USDA canning guidelines for adjustments.
#### Step 5: Cooling and Storing
After processing, use a jar lifter to carefully remove the jars from the canner. Place them upside down on a towel to cool, or simply place them upright on a cooling rack. Allow them to cool completely, usually for 12-24 hours. Once cooled, ensure that the lids have sealed properly by pressing down in the center of each lid. If it pops back, it hasn’t sealed correctly. Store sealed jars in a cool, dark place.
### The Benefits of Home Canning
Home canning offers numerous advantages. First, it preserves the flavor and nutritional value of the fruit, making it a healthy alternative to store-bought canned products loaded with preservatives. Second, it allows you to control the ingredients, enabling you to avoid harmful additives.
Additionally, home canning can be significantly more cost-effective than purchasing canned goods, especially during peak harvest seasons. Plus, sharing your homemade canned peaches with family and friends creates a sense of community and pride, enhancing your connections with loved ones.
### Tips for Successful Canning
– Always use fresh, high-quality ingredients for the best results.
– Ensure all equipment is meticulously cleaned and sterilized.
– Don’t skip the headspace; it is crucial for proper sealing.
– Keep records of your canning adventures, such as date and type of fruit. This will help track freshness.
## Conclusion: Embrace the Canning Adventure
Canning peaches is more than just a method of food preservation; it is a cherished tradition that can imbue great pride in home cooks. As you embrace this flavorful canning adventure, remember that the memories created in your kitchen are as sweet as the peach preserves resting on your shelves. So gather your tools, prepare your peaches, and enjoy the delight of having a taste of summer ready to enjoy all year long. Happy canning!